 |
| Most Rez dogs spend their lives under open skies and have to contend with extreme temps and lack of food. |
 After researching different low-cost doghouses and talking to friends from Canada who are mushers, it became clear that the Alaskan-style doghouse design would be a feasible structure to make and distribute to Rez dog households around my region. The one above cost me $30.
 The cheap, plastic (and pricey) doghouses sold at pet stores do very little to actually trap in the body heat and shut out the elements. Having spent years testing out and sleeping in handmade shelters, I can tell you that it's loft (dead air space) that enables you to stay warm, hence the reason down jackets and sleeping bags work so well. Make a natural shelter with a small entrance to reduce heat loss and jam it with enough pine needles/leaves/debris and you will have the means of coping with brutal temps.
The tools needed are: Skil saw, jigsaw, tape measure, cordless drill, 2" deck screws. For added strength, I also put a bead of Liquid Nails glue on all of the joints and borders. I went with the Extreme Temperature Liquid Nails as I've been building these when the daytime temps are only around 30 degrees and needed a glue that would set up better.
Once the shell is screwed/glued together, the remaining 2x2 border is tacked up. This will provide the frame for holding the floor in place.The door is 11"x11".
The roof can be made removable for ease of cleaning the inside or you can just place a few screws to secure it until cleaning time arrives (recommended in windy areas like mine). This is the basic, uninsulated design that most sled dog mushers use. Fill it with a generous amount of straw and it will create quite a windproof nest.
If you want to add insulation, go with the quality 2" foam as it cuts easily and is more durable than the pink insulation. This size perfectly fits the 2" deep walls created by the 2x4 supports. This particular shelter has masonite paneling add over the insulation to prevent the latter from getting chewed on or flaking apart through use.
The picture above shows the lid with insulation before the masonite skin is tacked on.
The insulation being tacked onto the floor board. This particular dog house was painted and then had a coat of varnish applied to the legs and roof which are the two surfaces that will receive the most punishment.
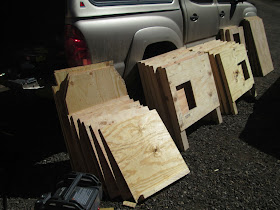
The materials consisted of: one 4x8x1/2 sheet of plywood (holds up much better than OSB), two 2x4x8s, and two 2x2x8s. Using the template below for cutting out the 4x8 sections allows for minimal waste. Lastly, I used exterior silicone caulking to seal up the 2x4 door frame and the corner joints. Again, the total cost for an uninsulated doghouse was $30 and for an insulated and painted version, it was around $65. These would also make a fine bunny hutch with the addition of a door and some ventilation holes.
Building a vestibule off the front will extend the living space for inclement weather. For this set up below, I merely screwed on some side panels (no glue, so I can remove this in the summer), put in cross-members and made a removable front panel.
 The stacked concrete on the inside is for placement of a small ceramic heater (the kind with the auto-shut off in case it gets tipped). The front facade will also be painted black to absorb more heat in the winter. There is a Lexan window on top for passive solar as well. The dog house will have a heating pad on the inside as well. The patio blocks keep the structure off the ground and the bottom wood edges were all treated with Thompson's Water Seal prior to placement.
 The extension measures seven feet in length and was coated with Thompson's upon completion along with some of the exposed corners/seams being caulked with silicon. I did NOT treat the interior as it might have a heater inside on occasion and there could be a danger with fumes.
I opted for woodchips over straw for the ground layer so there'd be less risk of a fire hazard with a heater. I plan to make a cage wrap-around for the heater to further reduce any concerns.
9 doghouses ready to deliver to one of our rescue fosters on the Navajo Rez who takes care of over 20 strays.
While unloading the dog houses, one of the large bags of dog food broken open. The dogs were kind enough to act as the clean-up crew and managed it quite well with only a few snarls at each other. Pretty amazing experience being in the presence of so many great dogs.
One of the houses was made lower to the ground for the small-fry dogs so they had easier access. Most of the Rez dogs are used to sleeping in groups at night so these houses can provide for 2-3 dogs.


